Making-of Khal Drogo

- Overview
- Modeling
- Texturing and Materials
- Hair
- Second beard part
- Small beards
- Eyelashes and eyebrows
- Lighting
Overview
Me (Ahmad Kouti) and my friend Behrang Taheri created a likeness character for Khal Drogo. We kindly shared the steps used to make this work.
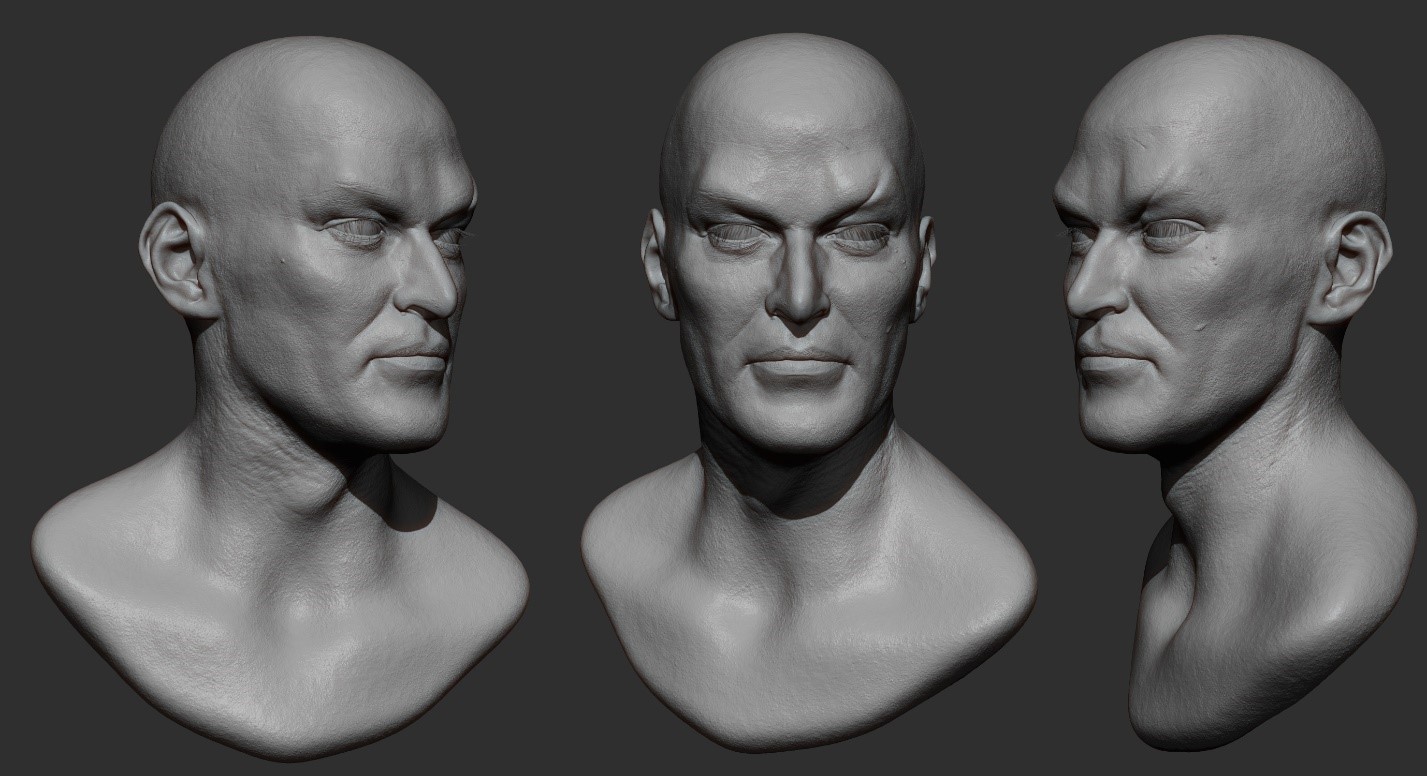
Modeling
There are many tutorials about likeness sculpting so we will jump to the next stage. The resulting sculpt:
Texturing and Materials
When sculpting was done, it’s time to texture the model. I used Mari for painting the main textures and Quixel Suite for making textures dirty and minor changes for this part.
I also painted a displacement map besides other textures and then imported it to Z-Brush. I used some ready-made displacement textures and also added details by hand in some places.
The process of rendering was a little annoying because it took many tries and after that, I decided whether to change textures or not. But at this stage, I painted many textures for diffuse (main color), epidermal (pale-diffuse), lower dermal (reddish texture), and upper dermal (something between diffuse and reddish texture-pink one). And at the rendering stage, I noticed that I should paint different masking textures for different parts.

For the specular map, you see that the specular value has been set to zero on the main material. I preferred to blend it as Shellac: some places are sharp, blurry, or masked to create visual differences.

There aren’t any specific values for parameters to use, they are different from case to case. One should try different parameters in conjunction with maps that we created earlier.
Hair
I chose the chin beard to start. For the still image, it is better to divide the beard into 3 parts. I defined a distribution map for the first part:


Then Edit Guides modifier has been added. I used its brushes to make the right shape. Beards have been moved to the clamps area.
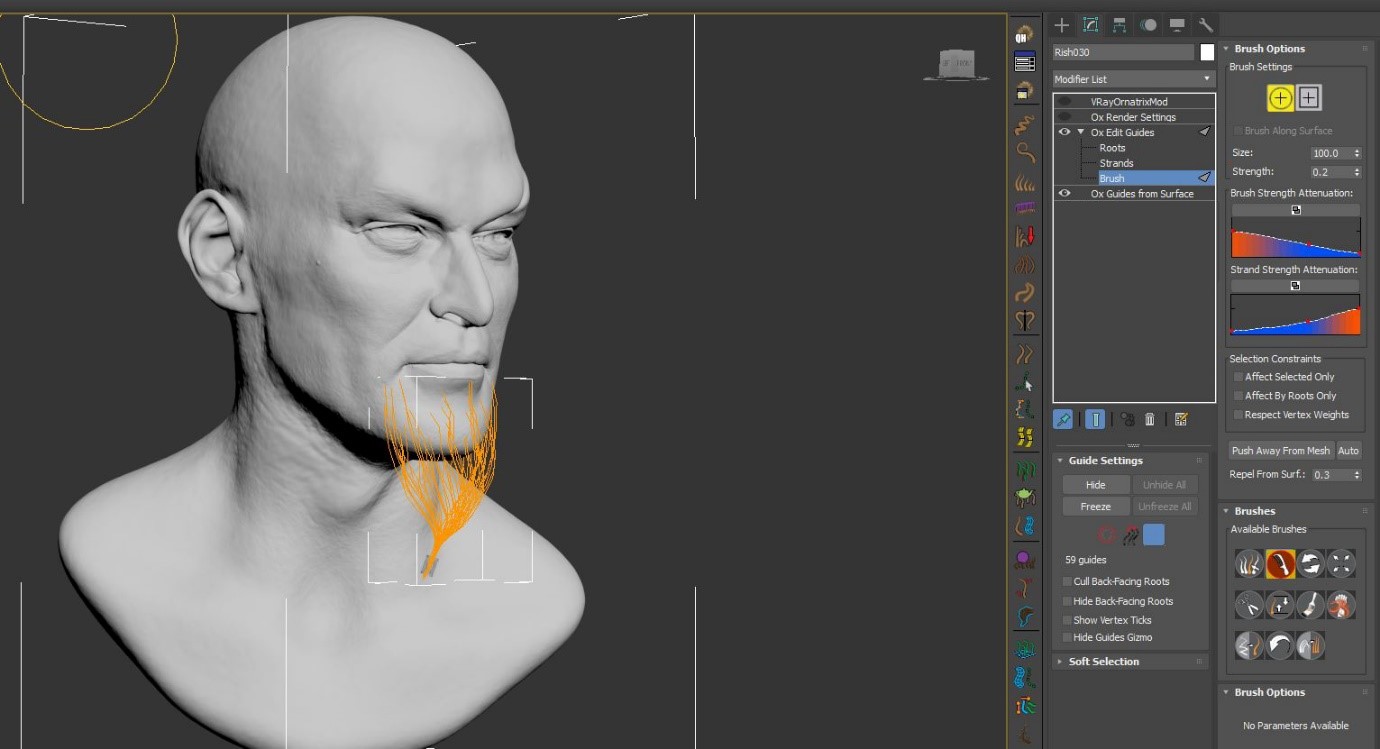
The result has been achieved by using Clustering, Curling, and Frizz modifiers. A thickness map was used to define hair thickness in the Render Settings modifier.

I drew two circles and converted them to Edit Poly. Then I used them with Guides from Surface modifier as a reference distribution surface:

Edit Guides modifier was assigned to them and the hair shapes have been adopted to clamps.
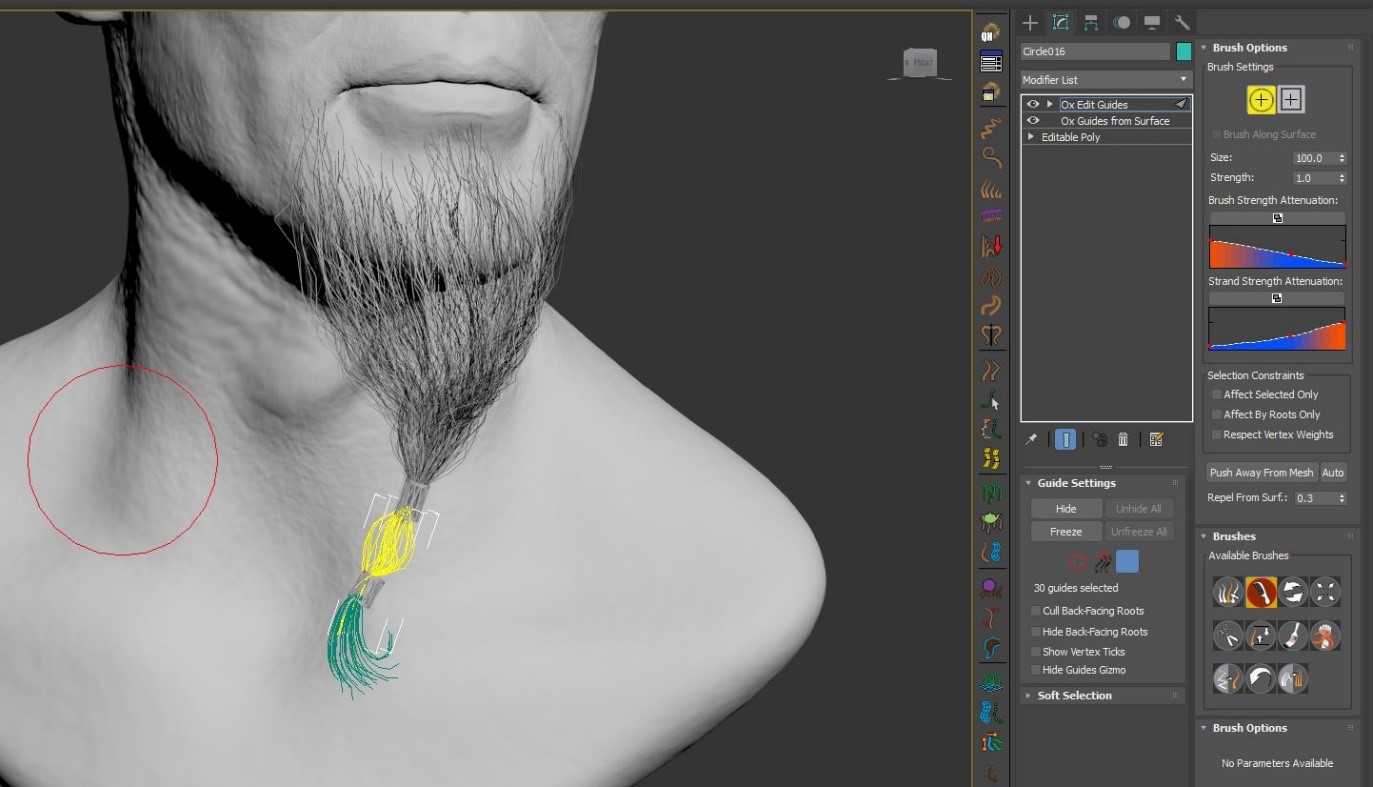
The Length, Clustering, Curling, and Frizz modifiers have been adjusted to match the references.
Second beard part

A distribution map has been defined for side beards and mustaches. After adding the Edit modifier and Edit Guides, Surface Comb, Length, Gravity, Detail, Clustering, Curling, and Frizz modifiers were added to match the references.

And here is the result:

Small beards
Eyelashes and eyebrows
The eyebrows creation looks similar to the other parts.

The eyelashes grow from polygons which are made to look like the eye shape. Then I used the Surface Comb modifier to create the correct shape.

Small and soft hairs cover the whole body.

And a distributed map has been created for the hair on the top and a comb modifier has been added.
Hairs have been edited with ox Edit Guides.
The comb, length, gravity, details, clustering, curling, and fizz were added and adjusted to match the reference.
The head hair and beards were duplicated and then edited to make the long and curly hairs around the head.

Lighting
I used a VRayDome with an HDRI plugged into it and two V-Ray planes on the back and left sides of the head to brighten it up. Other lights were added just for specular effects and reflections.

And voila!

This making-of has also been published on the official site of Ornatrix Plugin, you can read it from this link.